
Here we are at the last month of the Quilt Along! This month we are tackling curved piecing–which I think is easier when sewing by hand.
Our next block in the Book Club Hand Pieced Quilt Along is called Emma.
We named this block after Emma Woodhouse from the Jane Austen novel Emma. Much like many Jane Austen heroines, Emma spends a lot of time walking around the English countryside picking and arranging flowers. And this block just says flower to me!
(Disclosure: This post may contain affiliate links, which means I make a small commission if you buy from them, at no additional cost to you.)
Block Construction
You are definitely going to want to use the templates for this block! Those curved pieces demand it. Check out this video for tips on creating templates.

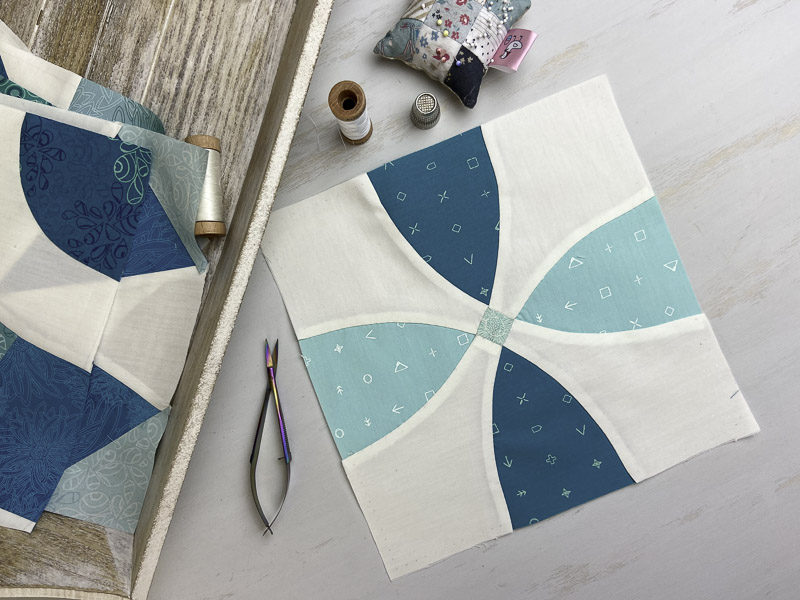
The Emma block (also know as the Flowering Snowball block) is one of my favorites!
Playing with color placement is fun with this block–there are so many different ways you can go! And the block can look completely different depending whether you decide to place your print fabric as the “half peel” or the “curved wedge”.

Piecing curves isn’t difficult, it just takes a little prep work of marking and pinning your pieces. Here’a a quick video on how to do that.

As always, lay your block out so that you know that you have your fabric placement exactly right. I’ve found that it’s quite easy to sew the half peel units onto the curved wedge pieces facing the wrong direction. So make sure that you keep your pieces in the correct orientation.

Fold the convex piece (half peel) in half to find the center point and finger press. I like to mark this with a pencil as well. Then fold the outside edge to the center point, finger press, and mark. Repeat with the other side, so that you have the unit marked in three places. Repeat with the concave piece (curved wedge).

Then it is simply a mater of matching up those markings. Match the center points as shown below and pin. Then continue to match and pin at each mark.

I like to go back and place a pin in between each of those marks as well. Since you are sewing two different shapes together, I think the more pins you have to keep things in place the better!
Once things are pinned securely, just sew on your stitching line in the usual way. I find that trying to sew with slightly smaller stitches helps that curve come out smoother.

When you get to this stage (above), make sure that you nest those center seams to have a nice, crisp center square.


Your block may look a little rumpled, but trust that it will look just fine after you give it a good press (which I did not get a picture of!)
Make sure that you also check out Patty’s beautiful block and enjoy her tips and tricks.
The Book Behind the Block

I love all of Jane Austen’s books, but I find Emma particularly delightful. I get a kick out of well-meaning but privileged and oblivious Emma, who is so confident that she know exactly what is best for everyone else’s life, while she remains clueless about her own. I’m looking forward to watching the most recent movie adaptation–I’ve heard that it’s wonderful!
Looking for the Book Club: A Hand Pieced QAL pattern?
HAND PIECING RESOURCES
Check out the whole Hand Piecing Basics video playlist on YouTube.
Patty has many written tutorials from the original Hand Pieced QAL.
STAY IN TOUCH
- Join our Hand Pieced Quilt Along Facebook Group
- Subscribe to our newsletter
- Follow Simply Everyday Handmade and Elm Street Quilts on Instagram
Pin it for later!

