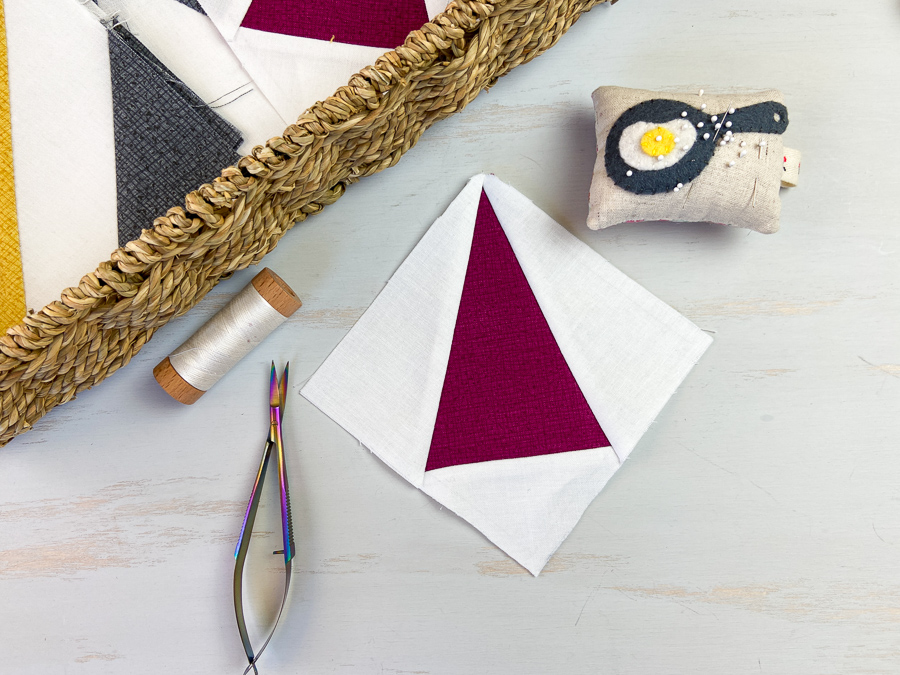

This week in the Harmony Hand Pieced Quilt Along, we have the trickiest unit, the Twisted Triangle in a Square.
You need to pay attention as you put these together–because the way that they go together is a bit non-intuitive. But just follow the pattern and check that you are sewing the triangle on in the right orientation–and you will be just fine!
This is one of those units that you will need to cut from the templates supplied with the Harmony pattern. No rotary cutting directions are given. It is VERY important that you measure the 1″ mark on your template sheet to make sure that you have printed it out at the correct size. If it’s small, then check your printer settings and print it at “Actual Size”.
(Disclosure: This post may contain affiliate links, which means I make a small commission if you buy from them, at no additional cost to you.)
Twisted Triangle in a Square Construction

One thing to keep in mind as you cut the pieces for this unit is that Templates D & E are reversed versions of the same shape. If you are using a solid background (like mine above)–you can cut them all with one template, because solid fabric has no “right” and “wrong” side. So you just cut eight and put them in the correct orientation. BUT-if you are using a fabric with a “wrong” side, then you need to pay attention to using the correct templates when you cut those pieces.
About marking stitching lines: For this unit, I actually advise you to mark the stitching lines on both the background pieces and the center triangle. While that may seem like over-marking, it does help you to make sure that your pieces are lined up precisely.

The first step is to lay out the unit. What is a little tricky about this unit is how the “skinny” part of three triangles all come together in one spot. (If you’ve ever done a normal Triangle in a Square block, you would flip that background triangle, matching the wide and to the narrow end, but I digress.)

It doesn’t actually matter which background triangle you sew on first, but after making quite a few of these, I decided that I like sewing the small triangle on first. This is not the way that it is shown in the pattern, but that way works too.

As you begin sewing on the side triangles, pay attention to a few things. First–make sure that you are lining up the LONG side of the background triangle. I can’t tell you how many times I thought the piece was too short, but I was just pining the wrong side of the background triangle!
Second, you are dealing with bias edges here, which means that they are stretchy. Resist the urge to handle the pieces too much before you pin them together, or they can get stretched out of shape.


Lastly, when you pin them, take a moment to check to make sure that your pins on each end match up correctly. I like to stick a pin in right at the corner and then check the back side to make sure that the pin is right in the marked corner on that side as well. This will help you get a more accurate block.

After you stitch your first unit, trim off the dog ears and then measure it. Make sure that it is the proper size, and that there is a 1/4″ at each seam intersection so that you don’t lose your points when you stitch this into the block.

If it’s not perfect–don’t worry! You can fudge the seam allowance a bit when you stitch it into the block. But this is a perfect time to make some small tweaks to get a better result on the next unit. If your block is too small, maybe you need to stitch right outside the line, to make a more “scant” 1/4″ seam allowance. Maybe you need to adjust how you mark and cut. Again, you may find this video on improving the accuracy of your blocks helpful.
Patty has some great tips on this unit–make sure you pop on over and check out her post!
Next week we will be stitching all these beauties together to form our corner units. I think you will be surprised how quickly all these units come together! Now let’s get stitching!
Looking for the Harmony pattern?
HAND PIECING RESOURCES
- Check out the whole Hand Piecing Basics video playlist on YouTube.
- Patty has many written tutorials from the original Hand Pieced QAL.
STAY IN TOUCH
- Join our Hand Pieced Quilt Along Facebook Group
- Subscribe to our newsletter
- Follow Simply Everyday Handmade and Elm Street Quilts on Instagram
Pin it for later!

