![]()
Continuing with our series on preparing for the upcoming Hand Pieced QAL, Patty and I wanted to share our methods of cutting and marking the stitching lines for hand piecing.
I created a short video explaining my method.
If you would rather read than watch, here is a brief explanation.
(Disclosure: This post contains affiliate links, which means I make a small commission if you buy from them, at no additional cost to you. Rest assured that I only recommend products that I know and love.)
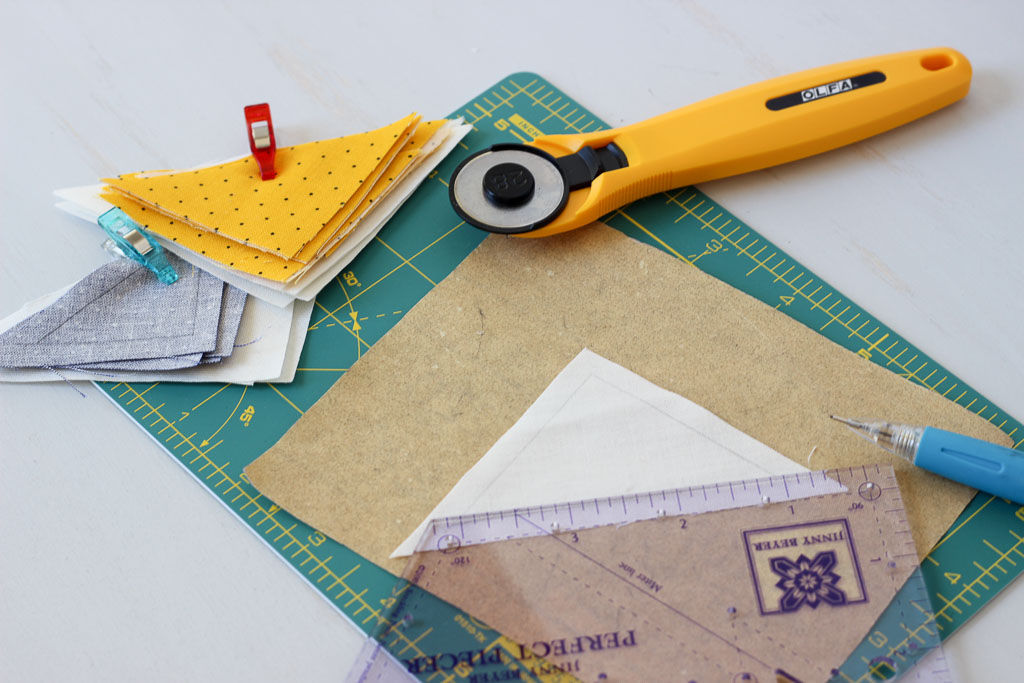
Cutting Fabric

Though it may be traditional to cut fabric with scissors and templates, I don’t do this. I love the modern tools of rotary cutters and self-healing cutting mats, and I cut my pieces for hand piecing in exactly the same way that I would cut them if I was going to machine piece the quilt top.
For the upcoming QAL, I cut out one block at a time and then keep the fabric organized with Clover mini clips.
Marking Stitching Lines

No matter how you mark your stitching lines, this is the first thing you need to know: When hand piecing, you don’t sew seam allowances down. You sew through them (we will cover this more a bit later). So your stitching lines start and stop 1/4″ from the edges of your fabric.
I like to keep it simple and mark all the stitching lines with pencil on the wrong side of all the patches for the block I’m working on. I like having all this prep work done ahead of time, so that I don’t need to worry about it later when I’m sewing.

My favorite tool for this is the Perfect Piecer. It has all the markings you will ever need for marking different shape patches for hand sewing. It even has little holes in it so that you can make little dots with a pencil, and just sew dot-to-dot, rather than marking the whole line.
I sometimes use a standard quilting ruler as well–anything that clearly shows a 1/4″ line will work just fine.
Some people only mark the side of the fabric that is facing them, and some mark as they go, so they are only marking the lines that they absolutely need. There are even some people, like hand sewing guru Jinny Beyer, that can actually just eyeball a 1/4″! Maybe someday I will be that accurate, but for now I mark!

I realize that I am marking more lines than I really need, but after experimenting, I find that I’m glad to have markings on every side of the patch–so that I can keep my options open when I’m sewing the block. I know that Patty does this differently–so make sure you read about her method as well–and then find what works for you!
Thanks to our Hand Pieced QAL Sponsors:

Pin it for later:


I love this!! Hand sewing just might be my thing these days. When I am home I have to do all of the other things to keep the house afloat
I am taking care of my daddy every day, he lives 4 miles away in a very nice community. He needs lots of love and attention.
He gets around very good for 94, but his heart is getting weaker. so he just likes to go slow
I have been bringing my hexies along in my little kit, but this project is very very excellent
Thank you for sharing this and it is very inspiring
I lied your explanation; it was clear and concise. hand piecing was the way I learned to quilt and will be happy to get back to doing more of it. i look forward to January when we really get started. Quick question, do you pre-wash your fabrics to allow for shrinkage and color bleed?