We are tackling the chapter called Cornered from The Ultimate Guide to Machine Quilting this week on the Machine Quilting Blog Hop. This chapter has some great information combining motifs and switching threads with the least amount of starts and stops. I really see the beauty of using blending threads to appreciate the texture that the quilting gives, without sweating trying to get it perfect (which it will never be).
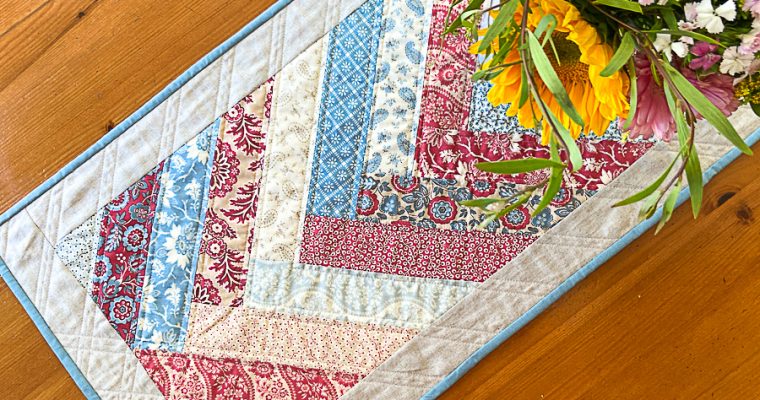
First up was spiral flowers. This motif was so easy and fun! I see it on any kind of girly quilt from a baby quilt on up. It would also make a fabulous motif for a spring table runner. I practiced this for just a few minutes before moving on. It was good to start with a design that came easily to me and gave me confidence–because that was all about to change.

The next design to tackle involved quilting continuous curves around a square. I have seen and appreciated this motif many times in other people’s quilts, but had never attempted it myself. Ahem. Let’s just say that it took a bit of practice. The first piece of advice I have if you want to try this motif is to keep those curves shallow. If the curves are too deep, then you start crossing over the lines when you do the diagonal curves. Christa explains how to approach this design to help you easily travel from square to square. She also teaches you how to do it in a corner, or triangle shape. After a frustrating start, I started to get the hang of it–however wobbly. I simply drew some lines on my practice piece with a Frixion pen to create some squares and kept practicing.

Once I erased the lines with a hot iron, the effect was pretty good.

I was pleased to see that even my wobbly start still looked pretty good with a blending thread. And on the back it is just pure texture. I love simple, square patchwork and this is a great design to complement a project constructed like that.

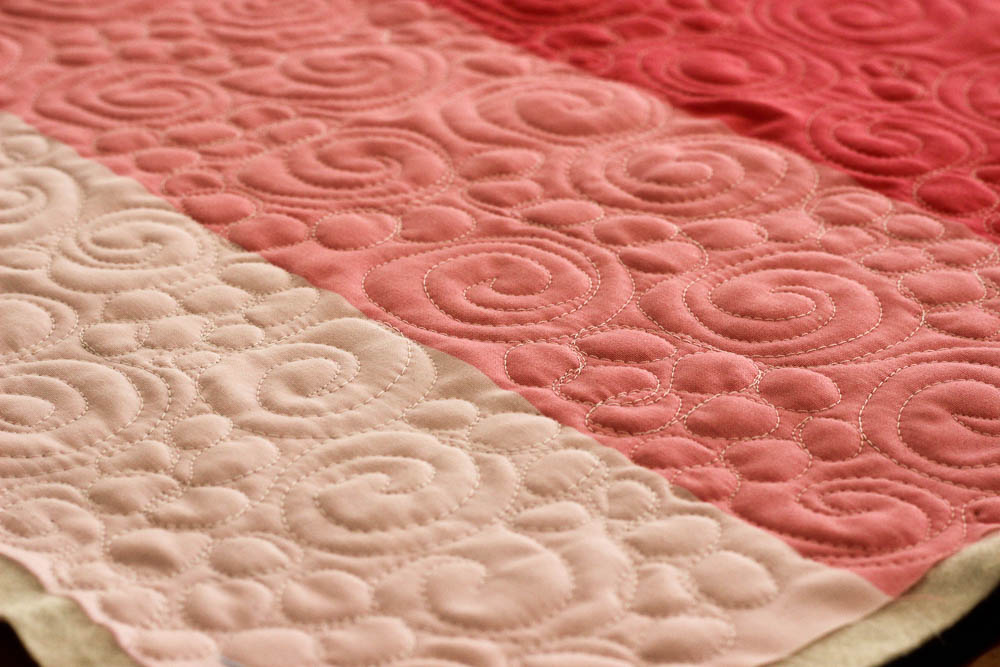
So, whew! I made it through the tough design of the week, right? Well, what has Christa gone and done but mash up two of my nemesis designs: spirals and pebbles! It looks totally charming when she does it and I heard her call it “Swirls and Pearls” when I watched her demo at Quilt Market last fall (cute, huh?!). This one I really practiced. My pebbles were already getting rusty and I learned again that bigger is better when it comes to pebbles for me. Thank goodness for blending thread! Here is how I ended the week.

Again, there are a couple other designs in this chapter that I didn’t photograph–lots of awesome inspiration. I learn every week that consistent practice makes progress (not perfection).
The only problem with doing all this free motion quilting is that it is making me want a new sewing machine! I actually dropped by a dealer this week because I’ve heard awesome things about the Juki TL-2010Q for free motion quilting. There is so much space! I came equipped with practice quilt sandwiches and patchwork squares to sew. At first I really liked it–it feels very different that my sewing machine. It’s very industrial and solid feeling. It’s a little on the noisy side, but I was digging it. But then a saleswoman walked by and said, “If you want a machine for free motion quilting–then you should try this one.” I was determined not to like it–it was more expensive and I was weirdly prejudiced against the Brother brand (turns out it ‘s the same machine as the Babylock Soprano). But, oh my!!! It free motioned like buttah!! The quilting foot is not a hopping foot–so it is so smooth and quiet. I was easily quilting with just my fingertips moving the piece around. It was amazing! It only has one more inch of horizontal space than my machine now–but it just feels so different! So–all that sort of threw me for a curve. I’m still thinking on it.
If you are quilting along, please let me know in the comments or on Instagram. Just tag your post #machinequiltingbloghop.
Machine Quilting Blog Hop series:
Make sure you make all the stops on the blog hop:
Vicki at My Creative Corner3
HollyAnne at String and Story
Jen at Quiltin’Jenny.

OMG, why didn’t I know about this, I will have to spend all tonight to read and catch up on my computer, it looks like a fantastic blog hop/learning experience, thank you.