Welcome to the Machine Quilting Blog Hop Week 3! Or, as I like to call it “Quilting with Friends”. It’s so good to hear from people in the comments, on Instagram, or on my Facebook page that are following along both in practice and in spirit. And I have loved reading about Jen, Vicki, and HollyAnne’s experiences along the way.
This week was fun! It started with some straight line quilting–which I was doing on a quilt anyway–so “check!” I really enjoy straight line quilting, or as I like to say, “straightish line” quilting. This design is one that I find myself cringing when I see the wobbles as I’m quilting–but when I stand back and look–those wobbles pretty much disappear. It is so easy to be critical when you are close-up, so stand back and give yourself a break. I was truly in my happy place quilting line after line, listening to the soundtrack from Les Miserable.

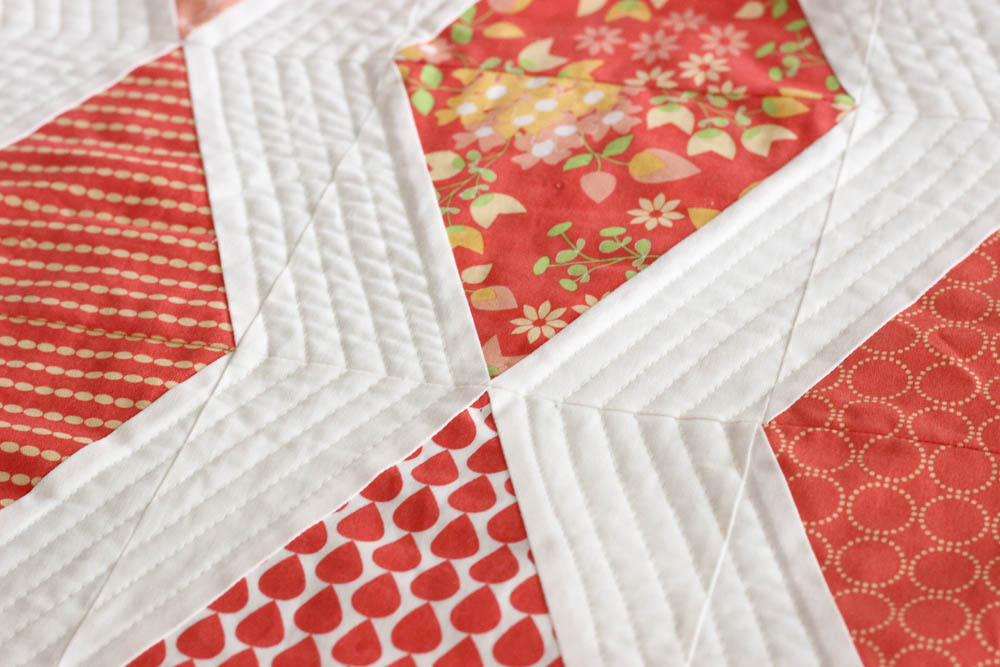
Then it was on to a similar design, but using a decorative stitch. This is one that I do all the time right now: the elongated wavy stitch.

I had never done it in a triangle shape before, so that was a bit challenging. You want to switch from the wavy stitch to a straight stitch to travel to the next starting point, so that you don’t have to keep breaking thread. I found it very inconvenient to keep switching stitches like that–especially because I need to modify the wavy stitch on my machine. I make it longer and wider than the default setting. This was a lot to mess with every time I switched back to the straight stitch to travel. So I actually dug out my sewing machine manual and looked up how to save stitches in memory. I saved the wavy stitch with the settings that I like, and I also saved the straight stitch. Then it was just a couple button clicks to move back and forth between the stitches. I felt like a genius!

Next was irregular zig zags and then came irregular chevron shapes. The chevrons were so fun and easy to do! I love the way they came out. This is going to be a very useful design, I can already tell. I switched over to a bending thread, but I actually like the one with the high contrast thread better. The stitch length is all over the place–but I’m finding my rhythm. I could really use one of those Bernina stitch regulators–and the Bernina to go with it 🙂

I am so glad that my new free motion foot finally come in from my dealer! (Queue angels singing!) I Iove this thing! I can see! I can finally see! Having this foot really made a difference in being able to see where I am, where I have been, and most importantly, where I am going. (I talked about my issues with my other darning foot last week. ) I practiced those darn pebbles again–and it is a lot easier–but they still need work.

Then on to small scale stippling. Stippling is the one free motion design that I feel I have the most experience with. When I was a new quilter I joined a guild that has a huge charity group. I used to take home 2-3 quilts each month just to practice stippling. But, I had never done it on such a small scale before. The stipples may not actually be micro-stipples, but they are pretty small for me.

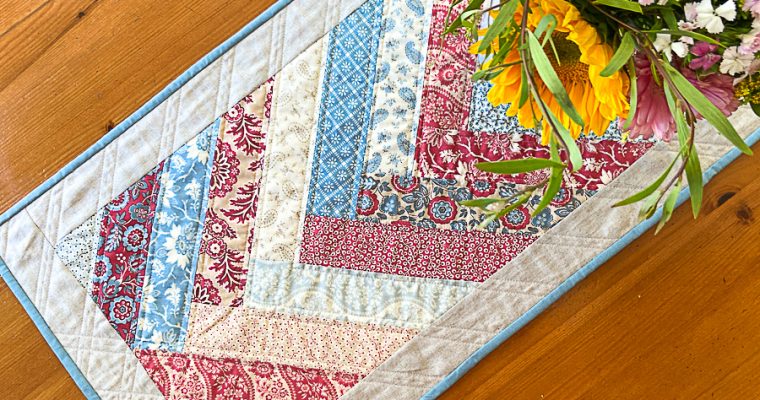
Lastly, was a fun triangle spiral–which I did once across the practice piece and then when back and filled in all the remaining spaces with more triangle spirals. I’m still working on keeping my stitch length consistent, but this was a fun design.

After last week’s pebbling challenge, I felt that this week was pretty fun and easy–a good confidence booster. And it is a mix of both walking foot and free motion designs, which is a nice change up. I’m still practicing those pebbles though…
Don’t forget–The Ultimate Guide to Machine Quilting is on sale all month long over on the Martingale website. It’s a great time to grab a copy!
Are you seeing progress with your own stitches? We’d love to see! Don’t forget to share on Instagram: #machinequiltingbloghop
Check out what the others are doing:
Jen at Quiltin’Jenny
Vicki at My Creative Corner3
HollyAnne at String and Story
Or just click the image below to get all the links.

Such a great idea to save the stitches! My machine does that too but I had never thought of it. You ARE a genius!!