
Scrappy Christmas Table Runner
Size: 12” x 42”
Block size: 6″
Materials
- 1 ½” strips assorted prints (I used a honeybun of Holly’s Tree Farm from Moda)
- Background fabric, neutral (I used Kona Snow), cut into 6 7/8″ strips
- Cotton quilt batting, such as Warm and White
- 3/4 yd. backing fabric
- 120″ of 2 1/4″ strips for binding
- Triangle in a square Bloc Loc ruler, 6″ (optional, but helpful), also available on Amazon here.
Here is an alternate method of making Triangle in a Square blocks, though not at 6″.
Note: All seams are 1/4″
Block Assembly

- Sew together 7 strips and press the seam allowances all the same direction. Using the triangle template, cut out the first triangle. Continue using the template to cut 14 triangles.

2. Using the second template, cut the background fabric as shown. You should have 14 sets of 2.

3. Lay out the triangle and background pieces as shown.

4. Position the background fabric on the left side of the triangle as shown and stitch. Press open.

5. Position the remaining background fabric on the right side of the triangle as shown and stitch. Press open.

6. Repeat for remaining 13 blocks. You can get some good chaining piecing going by doing Step 4 on all the blocks, pressing, and then Step 5 on all the blocks.
7. Using the Bloc Loc ruler, trim to perfection! The assembly part of this project will go so much smoother when the blocks are are perfectly uniform.
Table Runner Assembly


8. Layout blocks as shown and sew them together. Instead of sewing them in rows, I do them as 4-patches and then sew the 4-patches together. I find that I get more accurate nesting seams than if I try to stitch full rows together.

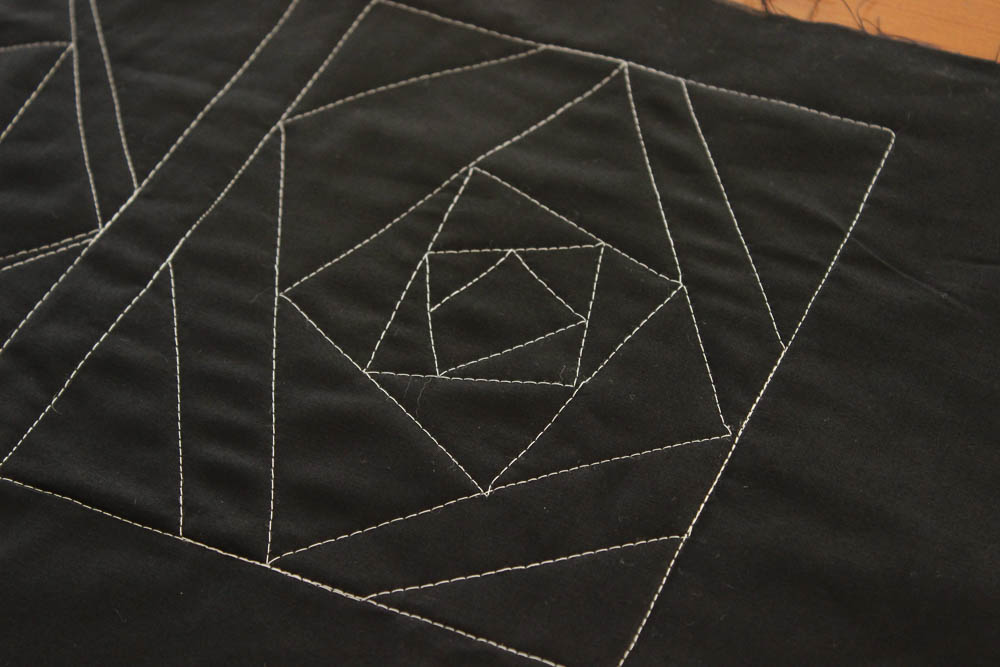
9. Baste and quilt as desired. I did some straight line quilting with a walking foot in the background areas only, using Aurifil 2311. Bind.

This pattern has so many possible variations! You can use a single print for each triangle, instead of going scrappy. Or you can make the triangle space a neutral fabric and use the prints for the side pieces, for a totally different look. I’m looking forward to playing around with this a bit more and hopefully ending up with a stack of new table runners! And then I will move on to full-size quilts!
Let me know if you make a Scrappy Table Runner! I’d love to see it! Please tag me on Instagram: @kristin_esser.
Pin it for later:


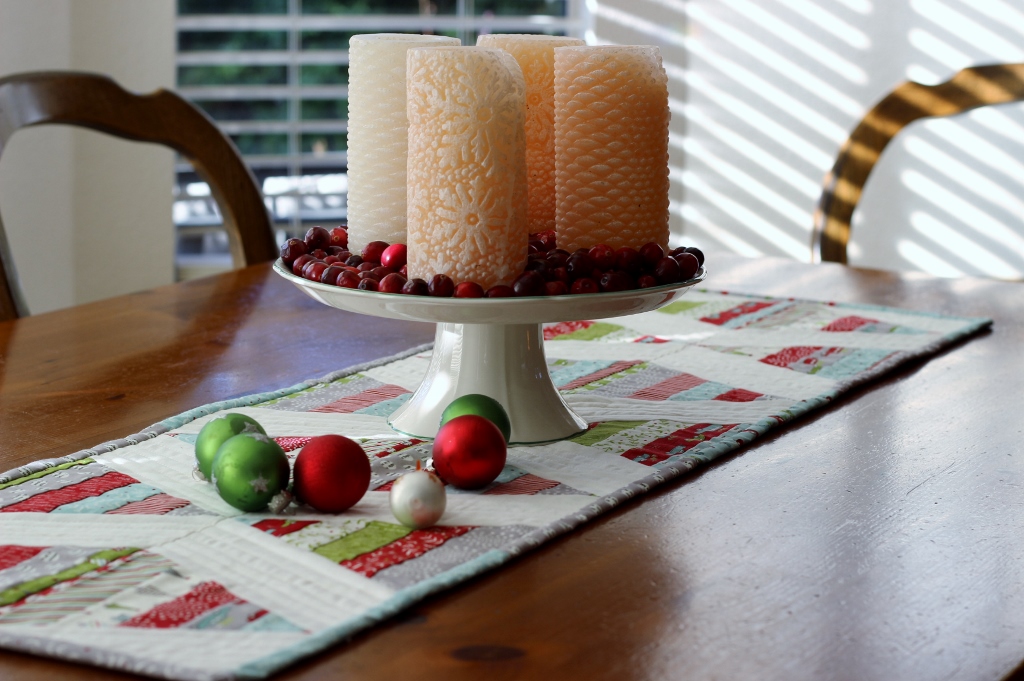
I love the tutorial but especially love your pretty centerpiece on top! Merry Christmas:)!
Thank you! That centerpiece is just my homemade advent wreath. Thanks for stopping by!